Go Back
+ servings
Crispy Garlic Chive Dumplings (Gui Chai Tod)

Homemade Crispy Garlic Chive Dumplings That Wow Every Time

These Crispy Garlic Chive Dumplings (Gui Chai Tod) are a delicious appetizer with a crispy exterior and fragrant filling, perfect for any occasion.
Prep Time 20 minutes
Cook Time 20 minutes
Resting Time 20 minutes
Total Time 1 hour
Servings: 4 dumplings
Course: APPETIZERS
Cuisine: Asian
Calories: 150

Ingredients
  

For the Dumplings
  • 230 g Garlic chives giving these dumplings their distinct flavor and aroma
  • 2 tsp Sugar enhancing the overall taste and balancing the saltiness
  • 0.5 Tbsp Soy sauce a key ingredient for depth in flavor
  • 0.5 tsp Salt essential for elevating the dish's overall taste
  • 0.25 tsp Baking soda optional, providing a slightly lighter texture in the dumplings
  • 2 tsp Neutral oil used for sautéing and frying the dumplings to perfection
  • 1 clove Garlic finely grated or minced, bringing in rich flavors in every bite
  • 0.25 tsp White pepper adding a subtle hint of heat to the mixture
  • 100 g Rice flour forming the base of the dumpling dough
  • 100 g Tapioca starch contributing to the chewy and textured outer layer
  • 1 cup Water combined with rice flour and tapioca starch to create the batter
For the Dipping Sauce
  • 1 Tbsp Sugar sweetening the sauce to complement the dumplings
  • 1 Tbsp Water dissolving the sugar for a silky sauce consistency
  • 1 Tbsp Vinegar adding a delightful tanginess to the sauce
  • 1.5 Tbsp Sweet soy sauce giving a rich sweetness that pairs perfectly with the dumplings
  • 1 Tbsp Soy sauce enhancing the umami flavor in the dipping sauce
  • 2-3 tsp Sambal oelek or Thai chilies adjusting to taste for a spicy kick in the sauce

Equipment

  • mixing bowl
  • Steamer
  • Non-stick pan
  • cake pan
  • Pot

Method
 

How to Make Crispy Garlic Chive Dumplings
  1. Prepare the chives: Cut about 1.5 inches off the bottom of the garlic chives and discard. Wash them thoroughly to remove any dirt, then dry the chives completely.
  2. Chop and mix: Cut the chives into small pieces, just under 1 cm long, and place them in a mixing bowl. Add salt, sugar, soy sauce, baking soda (if using), white pepper, oil, and garlic. Mix until well combined and let it sit for at least 20 minutes for the flavors to meld.
  3. Make the dipping sauce: In a separate bowl, combine vinegar, water, and 1 tablespoon of sugar. Stir until the sugar dissolves, then mix in the remaining ingredients for the dipping sauce, blending until combined.
  4. Prepare the batter: In a pot, add water, rice flour, and tapioca starch. Stir well until there are no lumps. Turn the heat to low and stir constantly until the mixture thickens to a Greek yogurt consistency. Remove from heat and break any lumps that might form.
  5. Combine: Off the heat, gently stir the chive mixture into the batter until everything is well combined. This should become a thick and fragrant dough.
  6. Prepare the cake pan: Grease a 7-inch round cake pan with oil and line the bottom with parchment paper. Carefully pour the batter into the pan, smoothing the top for even cooking.
  7. Steam: Preheat your steamer with boiling water. Once ready, steam the dumplings for 15-20 minutes, or until fully cooked through. The internal temperature should reach at least 190°F.
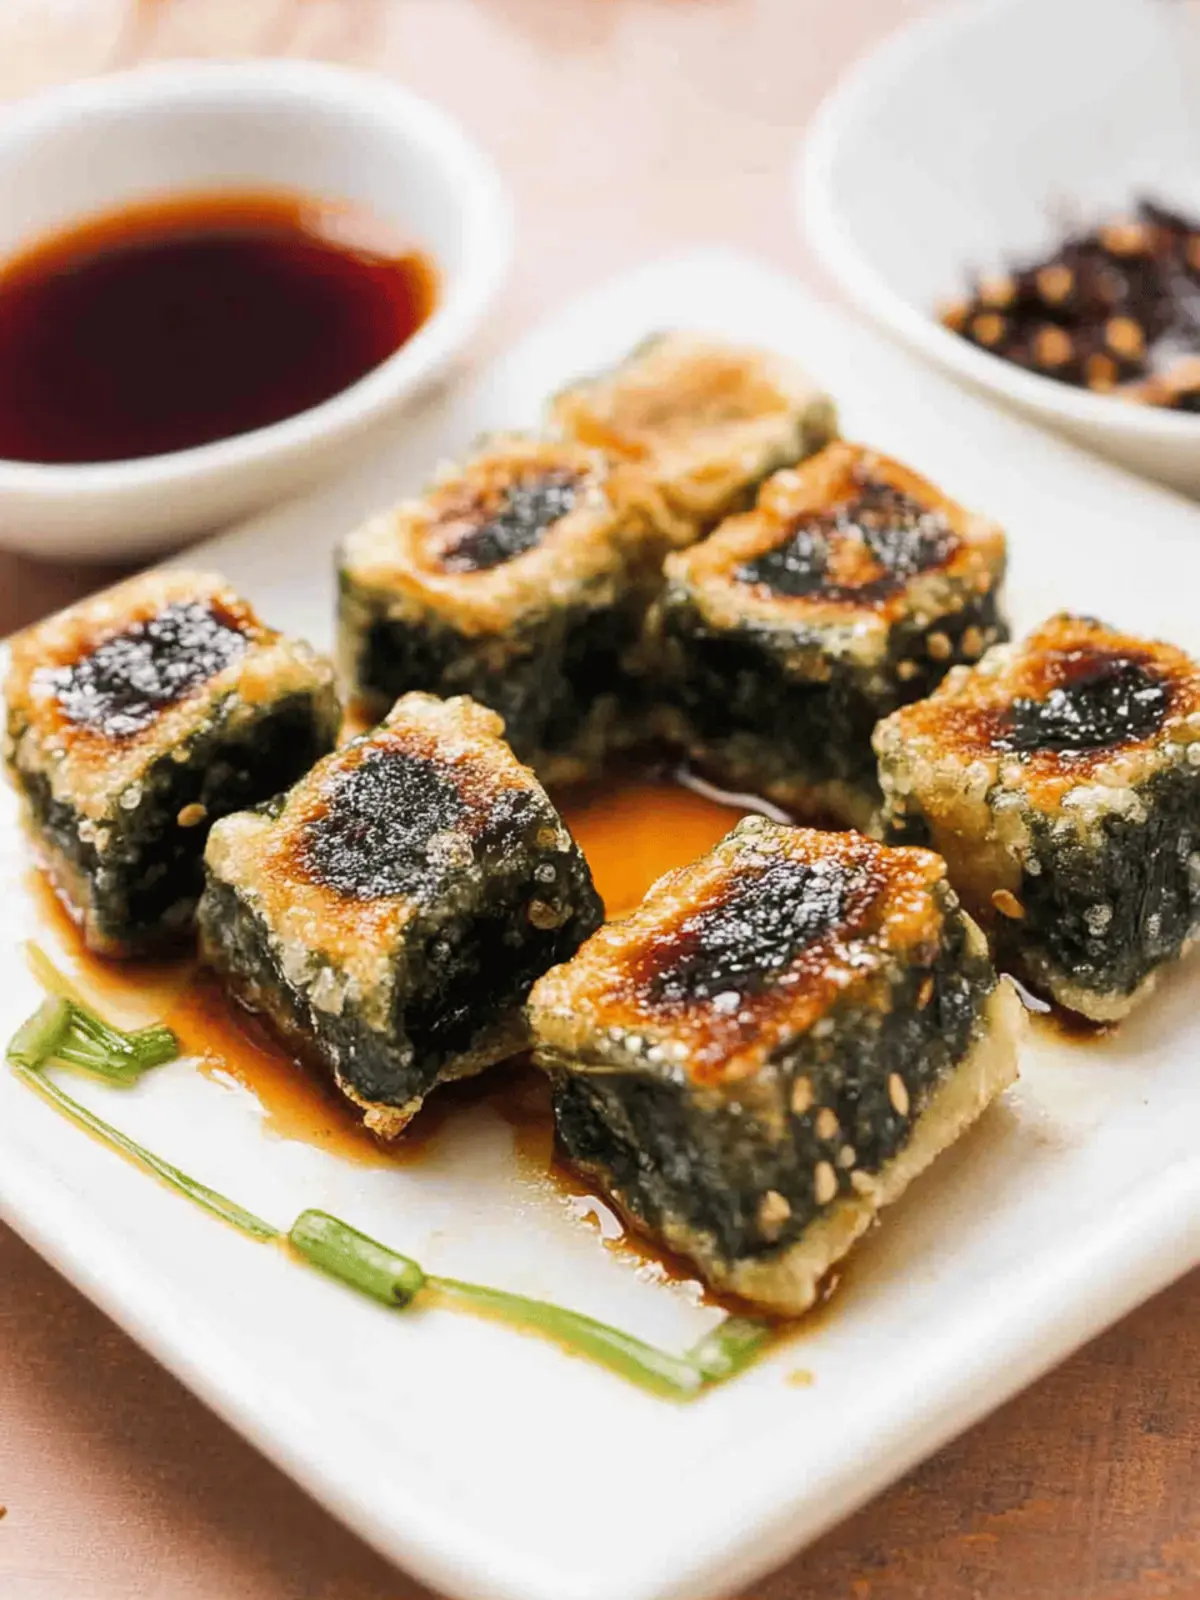
  8. Cool and cut: Allow the dumplings to cool completely, or chill them until you're ready to serve. Use a greased sharp knife to cut them into bite-sized pieces.
  9. Fry: In a non-stick pan, heat enough oil to cover the dumplings halfway. Fry them until they are golden brown and crispy on both sides, creating that perfect crunch.
  10. Serve: Present the crispy dumplings hot alongside the prepared dipping sauce for a delightful experience.

Nutrition

Serving: 1dumplingCalories: 150kcalCarbohydrates: 24gProtein: 3gFat: 4gSaturated Fat: 0.5gPolyunsaturated Fat: 1gMonounsaturated Fat: 2gSodium: 300mgPotassium: 200mgFiber: 1gSugar: 3gVitamin A: 500IUVitamin C: 10mgCalcium: 20mgIron: 1mg

Notes

Optional: Garnish with fresh cilantro or sliced chilies for added color and flavor.

Tried this recipe?

Let us know how it was!