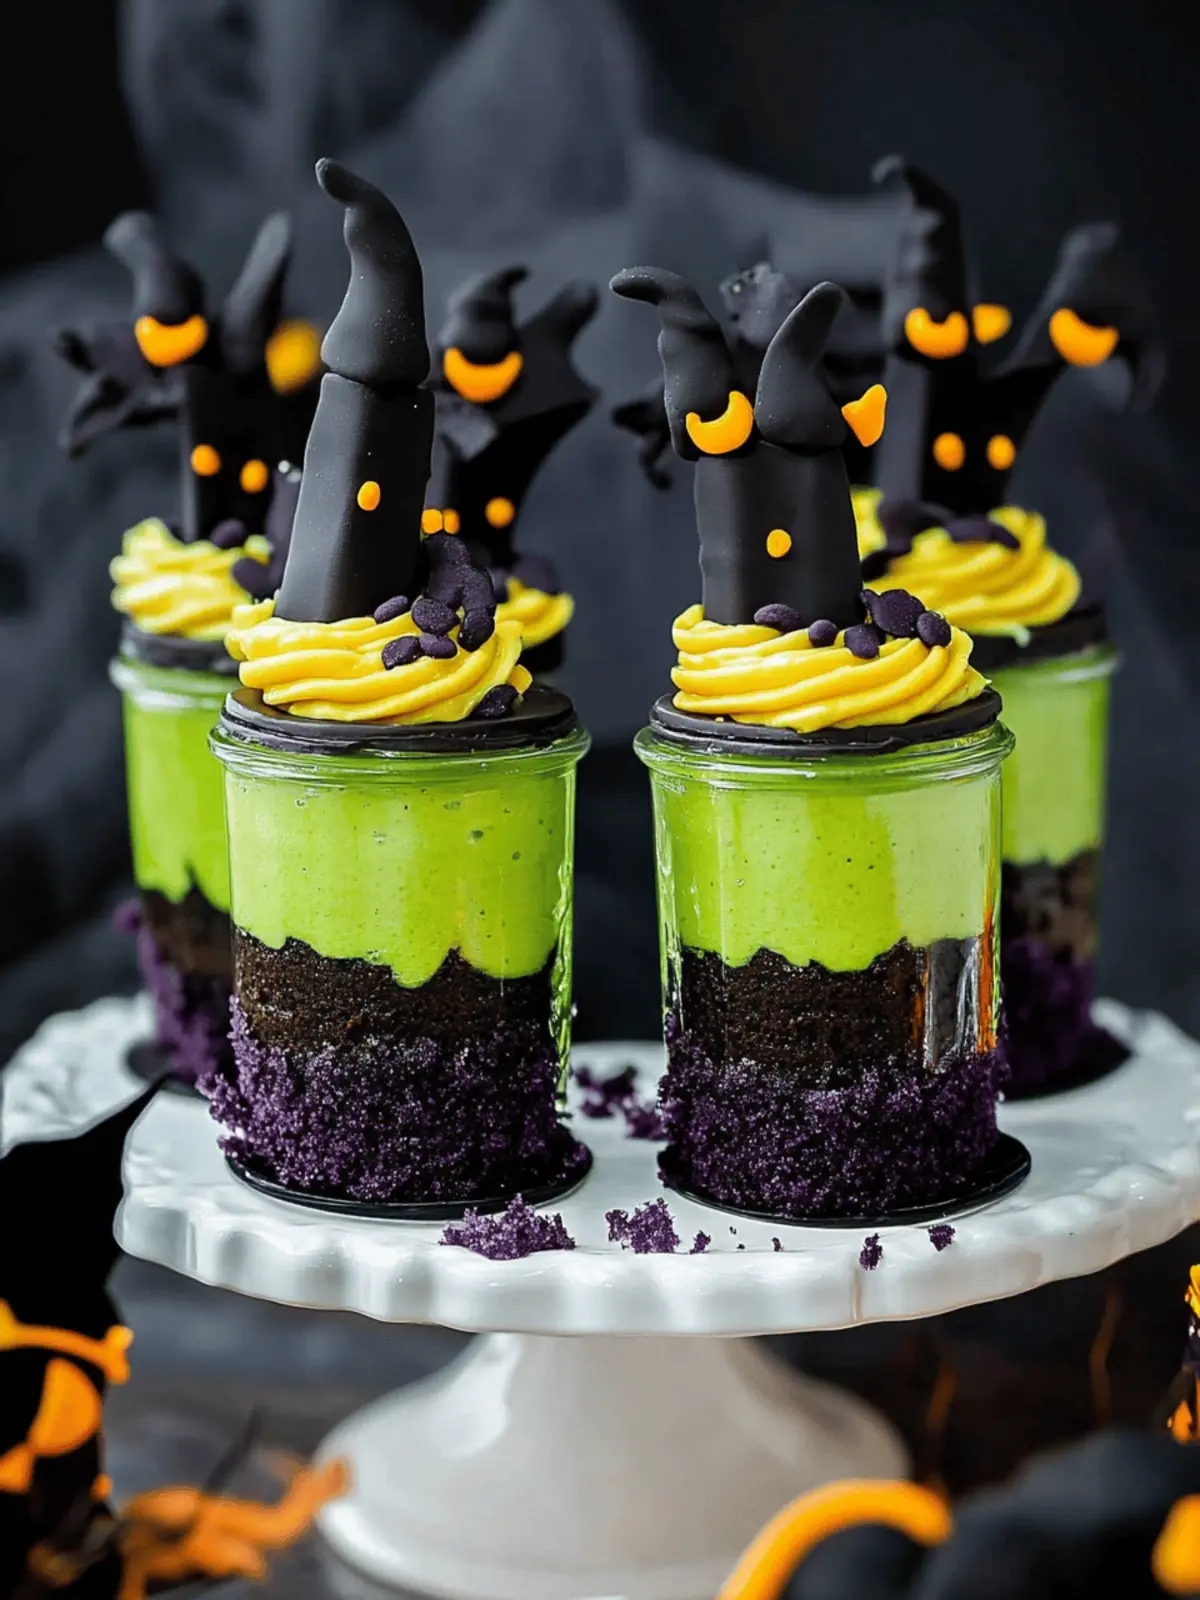
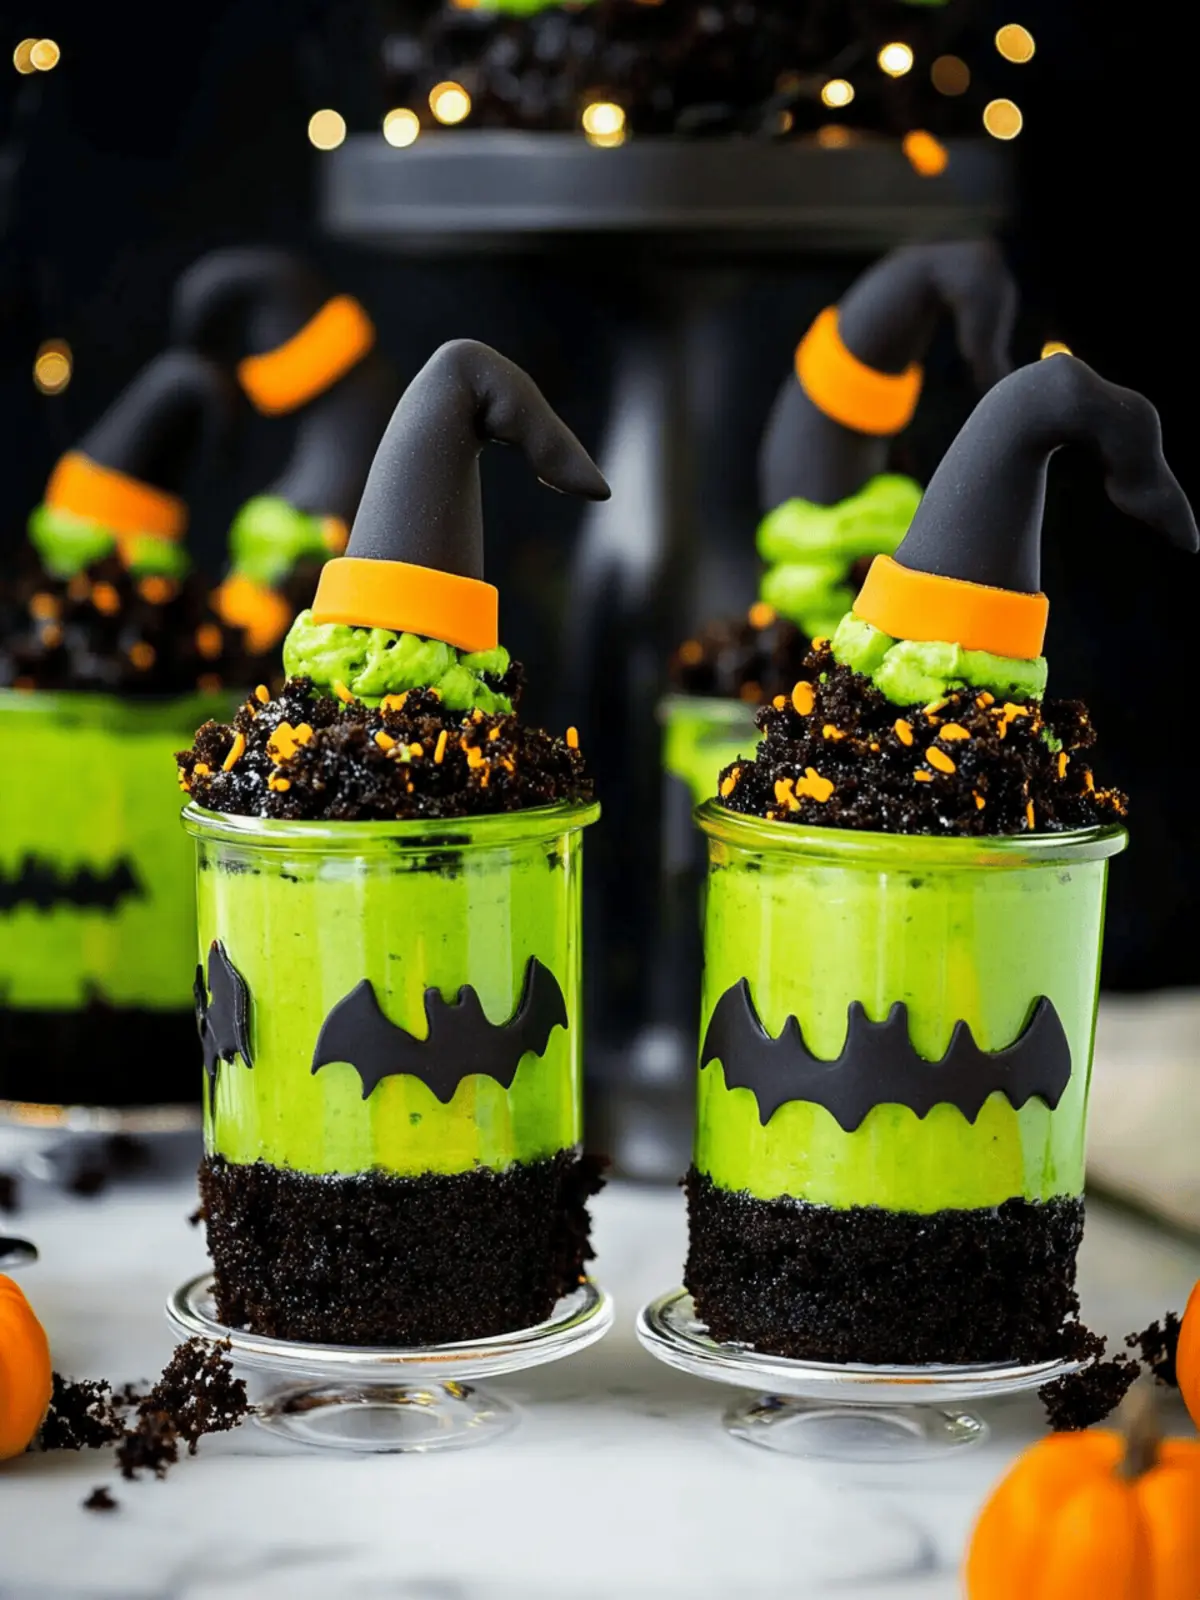
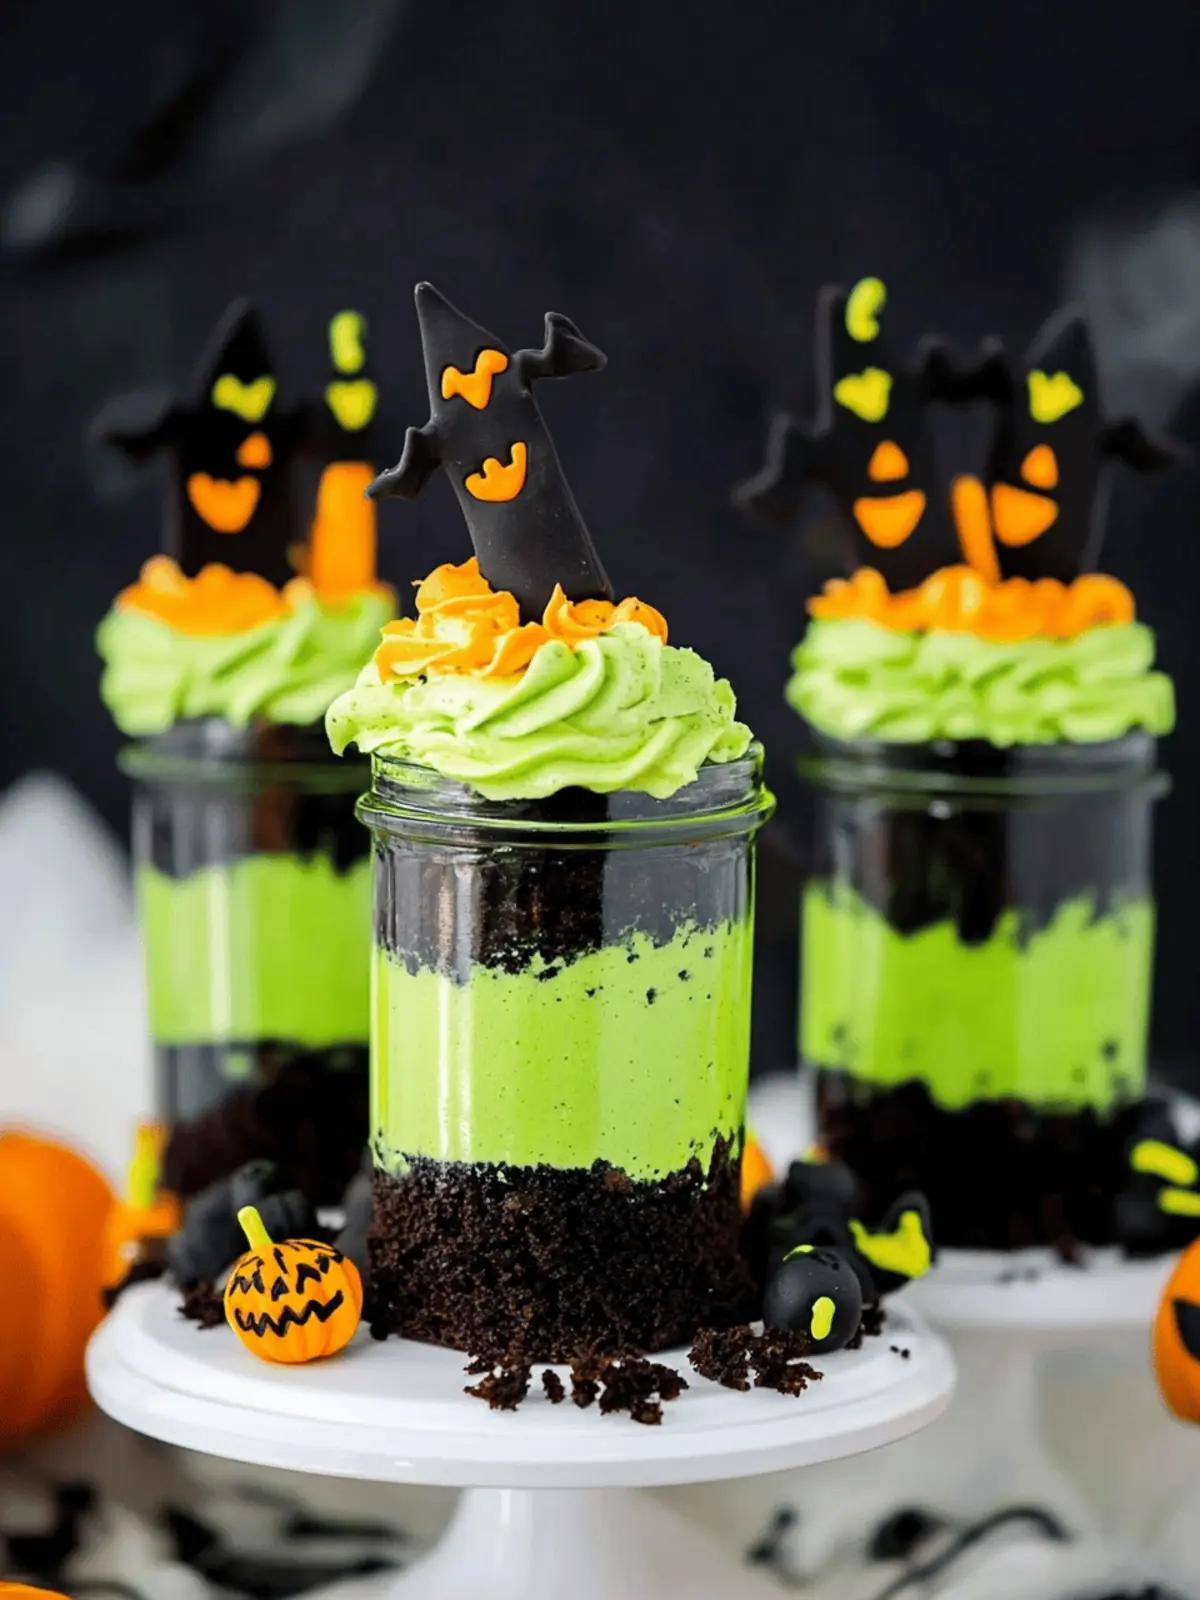
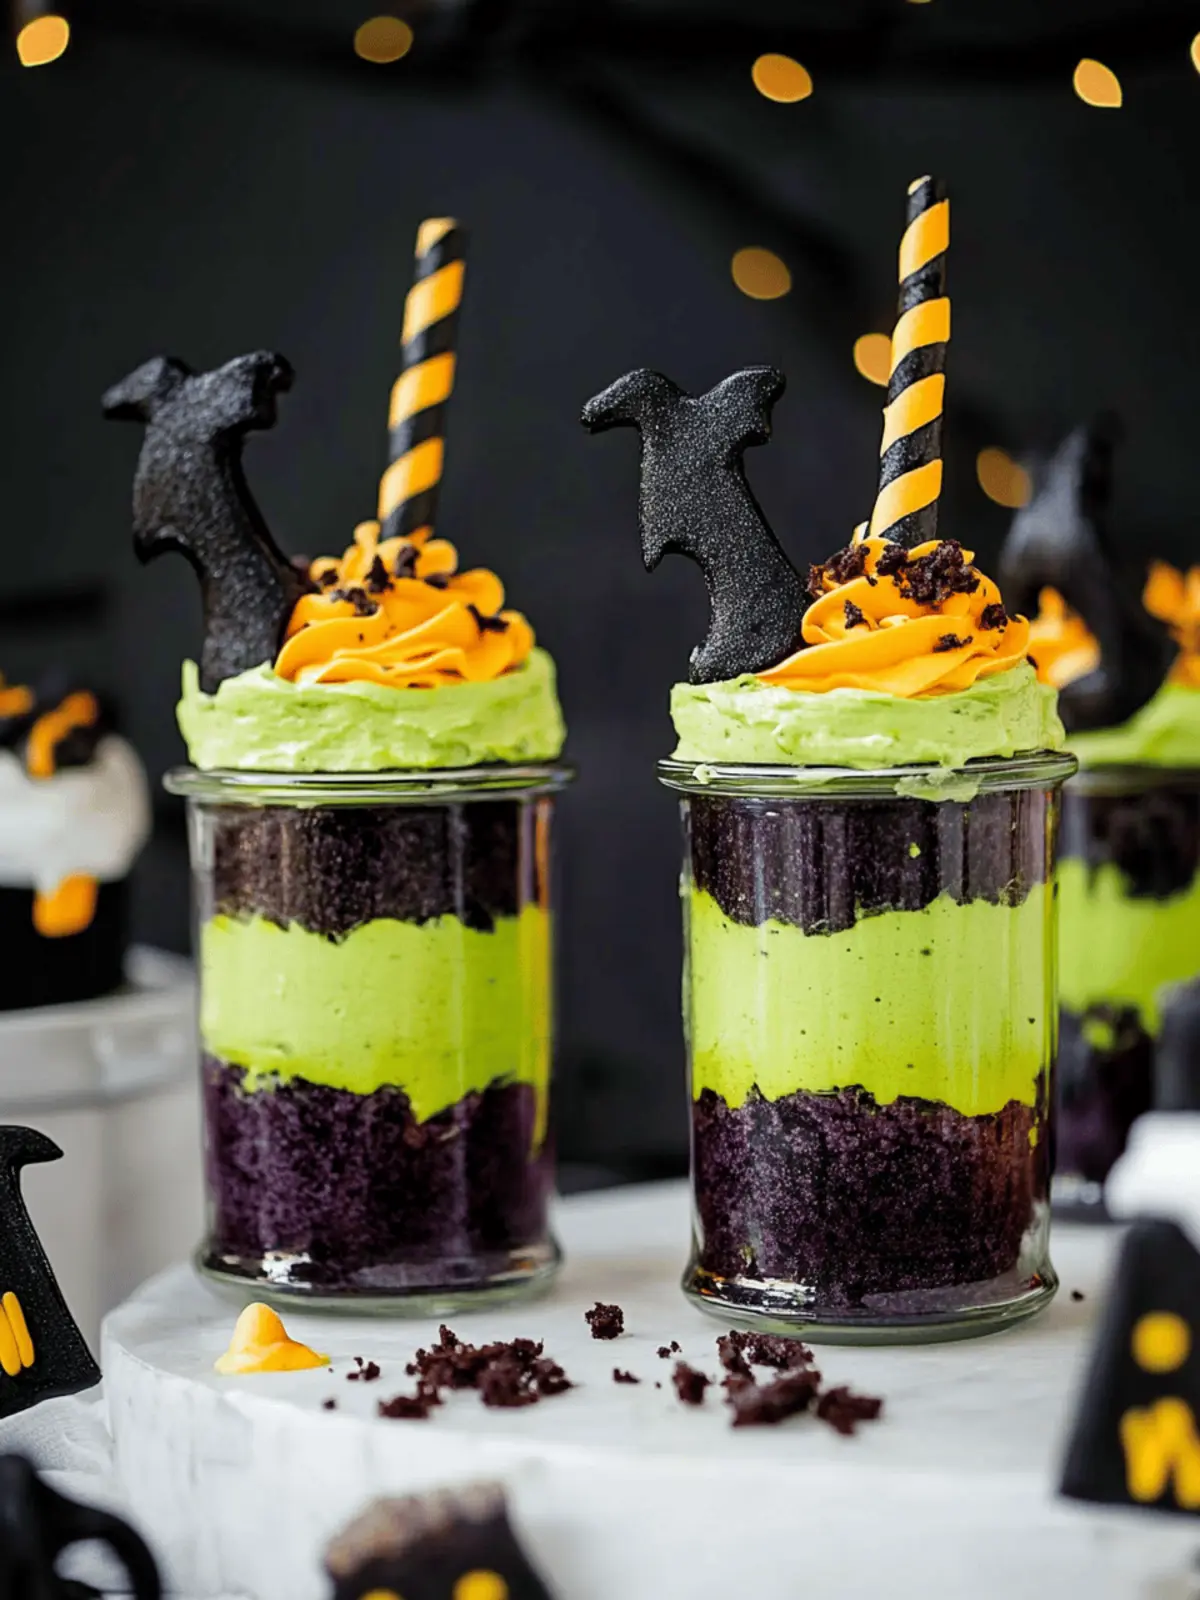
As the leaves start to change and the air turns crisp, Halloween whispers its arrival, beckoning us to embrace the spooky season in the sweetest way possible. This year, I’m stirring up a delightful concoction with my Witches’ Brew Halloween Cake Jars. Imagine moist layers of rich chocolate cake nestled between swirls of vibrant green buttercream, all crowned with whimsical fondant witch legs peeking out. These charming little jars aren’t just a dessert; they’re a celebration of creativity and festivity, perfect for gatherings that call for a bit of magic.
Whether you’re hosting a Halloween party or simply looking to enchant your family with a fun treat, these cake jars will captivate hearts and taste buds alike. They blend ease and elegance, proving that impressive desserts don’t have to be complicated. Let’s dive into this bewitching recipe and make your Halloween festivities deliciously unforgettable!
Why are Witches’ Brew Halloween Cake Jars a must-try?
Magical Presentation: These cake jars are more than just a delight for the taste buds; they’re a visual feast that will impress your guests.
Layered Goodness: Each jar showcases rich chocolate cake and silky buttercream, creating a harmonious blend of textures that’s simply irresistible.
Family-Friendly Fun: With whimsical fondant decorations, these treats make for a perfect hands-on project with kids, bringing laughter and creativity into the kitchen.
Easy Assembly: Layering the cake and frosting in jars saves on clean-up and makes them easy to transport to parties or gatherings.
Flexible Variations: Feel free to experiment with flavors or decorations, allowing you to personalize these jars for any Halloween celebration.
Crowd-Pleaser: Whether at a spooky gathering or a casual family dinner, these delightful jars are sure to be the star of the dessert table!
Witches’ Brew Halloween Cake Jars Ingredients
Prepare to conjure up a magical treat with these Witches’ Brew Halloween Cake Jars!
For the Cake
- Self-Raising Flour – Provides structure and lightness to the cake; if unavailable, use all-purpose flour with baking powder (1 tsp per cup).
- Granulated Sugar – Adds the perfect sweetness and helps create a tender crumb; no substitutions recommended.
- Butter (unsalted) – Infuses the cake with richness and moisture; margarine can be used but may slightly alter the flavor.
- Eggs – Bind the ingredients and add moisture to the cake; flax eggs can be a great vegan alternative (1 tbsp flaxseed meal + 2.5 tbsp water per egg).
- Unsweetened Black Cocoa Powder – Gives a deep chocolate flavor and rich dark color; replace with regular cocoa powder for a milder taste.
- Baking Powder – Ensures your cake rises beautifully; keep it fresh, or swap it with baking soda if necessary (adjust other acids in the recipe).
- Salt – Balances the sweetness and enhances flavor; no substitutions are necessary.
- Milk – Contributes moisture and richness; non-dairy options such as almond or soy milk work just fine.
- Vanilla Extract – Elevates the cake’s taste; consider almond extract for a different flavor twist.
For the Buttercream
- Powdered Sugar – Sweetens and stabilizes the frosting; no substitutions recommended.
- Electric Green Food Coloring – Adds a vibrant spooky element to your buttercream; optional—gel colors can also be used or left out for a natural look.
For Decoration
- Fondant (orange & black) – Creates adorable witch legs to top your jars; chocolate or royal icing can also be substituted for simpler decoration.
- Sprinkles – Add a festive touch to your jars; feel free to switch them out for any themed decorations you like!
Embrace the spirit of Halloween as you gather these delightful ingredients for your Witches’ Brew Halloween Cake Jars!
How to Make Witches’ Brew Halloween Cake Jars
-
Preheat the oven to 170°C (340°F). Prepare a 9-inch square cake tin by greasing it with butter and dusting it with flour to prevent sticking.
-
Cream together the butter and granulated sugar in a large mixing bowl. Beat for about 2 minutes, or until the mixture is light and fluffy, creating a base full of flavor.
-
Add the eggs in pairs, mixing well after each addition. This will help incorporate air into the batter, making your cake light and airy.
-
Combine the self-raising flour, unsweetened black cocoa powder, baking powder, and salt in a separate bowl. Alternately mix these dry ingredients with the milk into the creamed mixture until just combined, ensuring everything is well incorporated.
-
Pour the batter into the prepared cake tin. Bake for 45 to 50 minutes or until a skewer inserted in the center comes out clean. The top should spring back lightly when touched.
-
Cool the cake completely in the tin for about 10-15 minutes before transferring it to a wire rack. Allow it to cool completely to prevent melting the buttercream.
For the Buttercream:
-
Cream the softened butter in a mixing bowl until smooth. Gradually add in the powdered sugar and vanilla extract, mixing until fully combined and fluffy.
-
Add the electric green food coloring to the buttercream until you reach your desired hue. Refrigerate the mixture until you’re ready to assemble the jars.
Assembling Cake Jars:
-
Cut the cooled cake into 3-inch rounds using a round cutter. This will fit perfectly into your jars for layering.
-
Layer a sprinkle of colorful sprinkles at the bottom of each jar. Place a cake round on top, followed by a generous layer of green buttercream.
-
Repeat for a second layer: another cake round followed by more buttercream, swirling the top to create a visually appealing finish.
-
Insert fondant witch legs as the final decoration, peeking out playfully from the buttercream to create a whimsical touch to your spooky dessert.
Optional: Garnish with additional sprinkles or themed decorations on top for an extra festive flair.
Exact quantities are listed in the recipe card below.
Tips for the Best Witches’ Brew Halloween Cake Jars
-
Let the Cake Cool: Ensure the cake is completely cool before frosting to prevent melting the buttercream, resulting in a messy assembly.
-
Layering Technique: Use a gentle hand when layering cake and buttercream to maintain the beautiful presentation in your jars. Don’t overpack!
-
Fondant Preparation: Allow fondant decorations to sit overnight to firm up, ensuring they hold their shape and look fabulous atop your cake jars.
-
Color Variation: Experiment with different food coloring shades for your buttercream to create unique themes that go beyond just Halloween.
-
Precise Measurements: Use a kitchen scale for precise ingredient measurements, especially for baking, to ensure your Witches’ Brew Halloween Cake Jars turn out just right.
-
Decorative Garnishes: Add fun sprinkles and themed decorations to enhance the festive look – they make your jars appear even more delightful and inviting!
What to Serve with Witches’ Brew Halloween Cake Jars?
Creating the perfect Halloween experience means pairing your bewitching cake jars with delightful accompaniments that enhance the festive spirit.
-
Spooky Fruit Skewers:
Fresh fruits like grapes, strawberries, and melon shaped into ghosts or pumpkins add a refreshing contrast to the sweetness of the cake jars. -
Witch’s Brew Punch:
A fizzy and colorful drink made with lemon-lime soda, blue raspberry syrup, and floating gummy worms sets a playful mood. -
Chocolate-Covered Pretzels:
The salty crunch of these treats balances the sweetness of the cake jars, offering a satisfying texture experience in every bite. -
Candy Corn Mix:
A festive bowl of candy corn combines perfectly with the spooky theme, adding a pop of color and sweetness that kids and adults love. -
Mini Ghost Marshmallows:
Place marshmallows decorated as little ghosts alongside your cake jars for a delightful, chewy treat that echoes the Halloween spirit. -
Pumpkin Spice Latte:
Warm, spiced coffee complements the chocolate flavor of your cake jars, creating a cozy pairing perfect for chilly October evenings. -
Chocolate Mousse Cups:
Light and airy, this dessert provides a rich chocolate alternative that harmonizes beautifully with the layered textures of the cake jars.
Witches’ Brew Halloween Cake Jars Variations
Feel free to let your creativity flow and customize these enchanting cake jars to suit your taste!
-
Flavorful Twist: Experiment with different cake flavors like vanilla or even spiced pumpkin for a seasonal spin. Each bite will surprise and delight your senses.
-
Vegan Delight: Swap the eggs with flax eggs (1 tbsp flaxseed meal + 2.5 tbsp water per egg) and use dairy-free butter and milk for a vegan-friendly treat. Your festivities can be inclusive and delicious!
-
Colorful Hues: Replace the electric green food coloring with shades of purple or orange to create a festive vibe that reflects your Halloween theme. The visuals will be just as appealing!
-
Simplified Decoration: Ditch the fondant and use chocolate decorations or themed edible images to create a quick and easy festive topping that’s just as charming.
-
Crunchy Texture: Add crushed pretzels or candy corn between the cake layers for a delightful crunch that adds an exciting twist to the usual smooth texture. Your guests will love the surprise!
-
Mellow Cocoa: For a sweeter, lighter flavor, substitute unsweetened black cocoa powder with regular cocoa powder. This will give you a milder chocolate experience without losing that rich taste.
-
Gourmet Buttercream: Infuse the buttercream with a sprinkle of cinnamon or a splash of peppermint extract for a unique flavor. These subtle hints can elevate your dessert to gourmet status!
-
Classic Charm: For a nostalgic touch, incorporate mini marshmallows or chocolate chips into the layers. These sweet surprises make each jar reminiscent of childhood treats and will surely evoke fond memories.
Let your imagination guide you as you tailor your Witches’ Brew Halloween Cake Jars; there are countless ways to make them uniquely yours!
How to Store and Freeze Witches’ Brew Halloween Cake Jars
Room Temperature: Keep your assembled cake jars in a cool, dry place for up to 2-3 days. Ensure they are covered with a lid or plastic wrap to maintain moisture.
Fridge: For longer freshness, store the cake jars in the refrigerator for up to 1 week. Remember to seal them tightly to prevent them from drying out and losing flavor.
Freezer: Cake jars can be frozen for up to 1 month; however, it’s best to freeze only the cake layers without frosting. Thaw in the fridge overnight before assembling and frosting.
Reheating: If you prefer your cake warm, gently microwave individual jars for about 10-15 seconds, then frost with cold buttercream for a delightful contrast in temperatures.
Make Ahead Options
These Witches’ Brew Halloween Cake Jars are perfect for meal prep enthusiasts! You can bake the chocolate cake and prepare the green buttercream up to 3 days in advance, storing each in airtight containers to maintain freshness. To do this, let the cake cool completely, then wrap it tightly in plastic wrap before refrigerating; the buttercream should be kept in the fridge as well. When ready to assemble, cut the cake into rounds and layer them with the buttercream in jars. Simply add your sprinkles and fondant decorations right before serving to ensure they look just as delightful as if you made them fresh! Enjoy the time-saving benefits of these magical treats!
Witches’ Brew Halloween Cake Jars Recipe FAQs
How do I choose the right ingredients for my cake?
Absolutely! When selecting your self-raising flour, look for one that’s fresh and finely milled to ensure proper texture. For the eggs, choose large, organic ones for the best flavor. As for your butter, unsalted is key for controlling the sweetness—be sure it’s at room temperature for easy creaming with the sugar. For the cocoa powder, unsweetened black cocoa gives that deep chocolate flavor, but if you prefer milder, regular cocoa can work well too!
What is the best way to store my cake jars?
I recommend covering your assembled cake jars with a lid or plastic wrap and storing them at room temperature for up to 2-3 days to maintain their delightful moisture. If you want them to last longer, pop them in the fridge, where they can stay fresh for about a week—just make sure to seal them tightly!
Can I freeze my Witches’ Brew Halloween Cake Jars?
Yes, you can! To freeze, it’s best to only freeze the cake layers without frosting. Wrap them tightly in plastic wrap and place them in an airtight container for up to 1 month. When you’re ready to enjoy, simply thaw the layers in the fridge overnight, then assemble and frost them for that fresh-made taste!
What if my cake turns out dry or doesn’t rise properly?
Very good question! If your cake is dry, it could be overbaked. Always keep an eye on the time, checking for doneness around the 45-minute mark with a skewer. For rising issues, ensure your baking powder is fresh—if it’s been sitting around for a while, it might have lost potency. Alternatively, if you’re using a substitute like baking soda, remember to adjust the other acidic ingredients to keep the balance.
Are there any dietary considerations I should keep in mind?
Absolutely! If you’re making these for someone with an egg allergy or following a vegan diet, swapping regular eggs for flax eggs is a fantastic alternative—simply mix 1 tablespoon of flaxseed meal with 2.5 tablespoons of water per egg, letting it sit until it thickens. Also, for dairy-free needs, you can replace the milk with almond or soy milk, and margarine can substitute butter if you’re avoiding dairy altogether.
How can I enhance the appearance of my cake jars?
Oh, the more the merrier with decorations! Use colorful sprinkles or themed chocolates to add a festive flair. If you’re feeling extra creative, consider using edible glitter or fun Halloween-shaped candies to really make your jars pop. Have fun experimenting with different toppings to bring your spooky desserts to life!
Witches' Brew Halloween Cake Jars for Spooky Sweet Fun
Ingredients
Equipment
Method
- Preheat the oven to 170°C (340°F). Grease a 9-inch square cake tin with butter and dust with flour.
- Cream together the butter and sugar in a mixing bowl for about 2 minutes until light and fluffy.
- Add the eggs in pairs, mixing well after each addition.
- Combine flour, cocoa powder, baking powder, and salt in a separate bowl. Alternately mix with milk into the creamed mixture.
- Pour the batter into the prepared cake tin. Bake for 45 to 50 minutes or until a skewer comes out clean.
- Cool the cake completely in the tin for about 10-15 minutes before transferring to a wire rack to cool completely.
- Cream the softened butter until smooth. Gradually add powdered sugar and vanilla, mixing until fluffy.
- Add electric green food coloring to the buttercream and refrigerate until ready to assemble.
- Cut the cooled cake into 3-inch rounds using a round cutter.
- Layer a sprinkle of colorful sprinkles at the bottom of each jar. Place a cake round on top, followed by green buttercream.
- Repeat for a second layer with another cake round followed by more buttercream, swirling the top.
- Insert fondant witch legs as decoration peeking out from the buttercream.
- Garnish with additional sprinkles or themed decorations if desired.

